Why You Might Need to Uninstall Apps
If an app is slowing down your computer, you’re not using it anymore or it’s taking up valuable storage space, you may want to consider uninstalling it. Whatever the reason, removing unwanted applications is one of the easiest ways to keep your Windows computer running smoothly and clean-up space.
Method 1: Using the Settings App (The Easiest Way)
This is the most straightforward method and works for almost all modern applications on Windows.
Step 1: Open Settings
- Click the Start button (Windows logo) in the bottom-left corner of your screen
- Type “Settings” and click the Settings app when it appears
- Alternatively, you can press Windows key + I on your keyboard as a shortcut
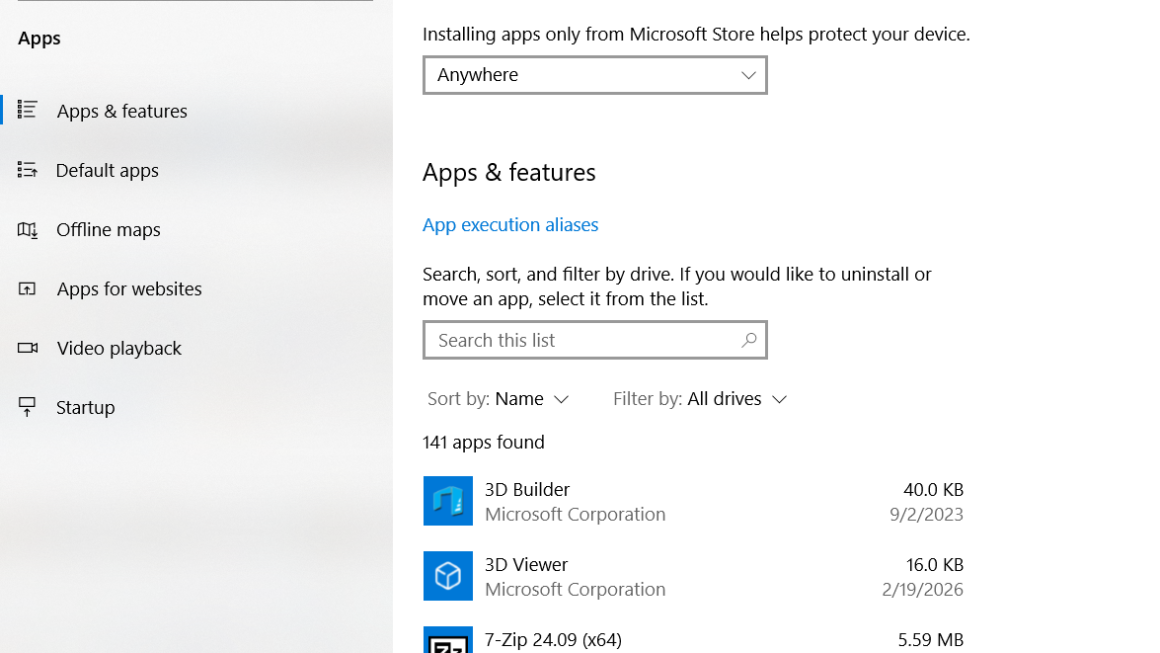
Step 2: Navigate to Apps
- In the Settings window, look for “Apps” on the left sidebar and click it
- Then click “Apps & features” (this might be called “Installed apps” depending on your Windows version)
Step 3: Find Your Application
- You’ll see a list of all installed programs on your computer
- Scroll through the list to find the app you want to remove or use the search box at the top to type the app’s name
- This is much faster if you know what you’re looking for
Step 4: Uninstall the App
- Click on the app you want to remove
- Click the “Uninstall” button that appears
- A confirmation dialog may pop up, click “Uninstall” again to confirm
- Windows will now remove the application
Step 5: Wait for Completion
- The uninstall process usually takes 30 seconds to a few minutes
- Don’t close the window or restart your computer until it’s finished
- You’ll see a message confirming the app has been removed
Method 2: Using the Control Panel
This is the older method, but it still works perfectly and some people prefer it. Can also be helpful for more stubborn apps.
Step 1: Open the Control Panel
- Click the Start button and type “Control Panel”
- Click the Control Panel app when it appears
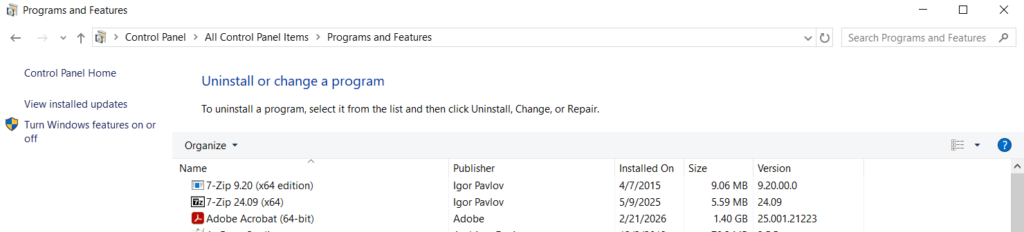
Step 2: Go to Programs and Features
- Look for “Programs” and click it
- Then click “Programs and Features” or “Uninstall a program”
Step 3: Find and Remove Your App
- You’ll see your complete list of installed programs
- Click on the app you want to uninstall
- Click the “Uninstall” button at the top
- Follow any prompts that appear
Method 3: Uninstalling from the App Itself
Some applications have their own built-in uninstaller.
Here’s how:
- Open your File Explorer (the folder icon on your taskbar)
- Navigate to C: > Program Files (or Program Files (x86) for 32-bit apps)
- Find the folder with your app’s name
- Look for a file called “Uninstall” or “Setup”
- Double-click it and follow the prompts
How to Verify the Uninstall Was Successful
After uninstalling, it’s good to confirm the app is really gone.
Check These Places
In Settings:
- Go back to Settings > Apps > Apps & features
- Search for the app name
- If it doesn’t appear in the list, it’s been successfully removed
On Your Desktop:
- Look for any shortcuts or icons related to the app
- If you see any, right-click them and select “Delete” to remove the shortcuts
In Your Start Menu:
- Click the Start button and search for the app name
- If nothing appears, the app is gone
Check Your Storage:
- Go to Settings > System > Storage
- Your used storage should have decreased (though not always noticeably, some apps are small)
Advanced: Manual Cleanup
Sometimes, even after uninstalling, leftover files remain on your computer. These don’t hurt anything, but if you want to be thorough or if you are running into errors, here’s how to clean them up.
Finding Leftover Files
Step 1: Access Hidden Files
- Open File Explorer
- Click the “View” tab at the top
- Check the box next to “Hidden items” to show hidden files
Step 2: Look in Common Locations
- C:\Users[Your Username]\AppData This folder contains app settings and data
- C:\ProgramData System-wide app information
- C:\Windows\Temp Temporary files
Step 3: Delete Leftover Folders
- Right-click any folder related to the app you uninstalled
- Select “Delete”
- Confirm when prompted
Important: Only delete folders you’re absolutely sure belong to the uninstalled app. Deleting the wrong files can cause problems.
Helpful Tips to Keep in Mind
Restart Your Computer After Uninstalling
- While not always necessary, restarting your computer after removing an app ensures Windows fully clears it from memory and completes any final cleanup steps
Check for Multiple Versions
- Some apps install multiple components, search carefully to make sure you remove all related entries in the Apps list
Use Storage Sense for Automatic Cleanup
- Windows has a built-in tool called Storage Sense that automatically removes temporary files
- Go to Settings > System > Storage > Storage Sense and turn it on for automatic maintenance
Back Up Before Deleting
- If you might need the app again, consider creating a backup or taking a screenshot of the app’s settings before uninstalling
Be Careful with System Apps
- Windows comes with built-in apps (like Notepad, Calculator, etc.)
- You can uninstall most of them, but avoid removing anything labeled as a “System” app unless you’re sure you don’t need it
Antivirus Software Requires Special Handling
- If you’re uninstalling antivirus or security software, make sure to install a replacement before removing the old one
- Never leave your computer without protection
What If the Uninstall Doesn’t Work?
The app won’t uninstall normally? Here are some solutions:
Run as Administrator
- Right-click the uninstall option and select “Run as administrator”
- This gives the uninstaller extra permissions it might need
Use Safe Mode
- Restart your computer and hold F8 during startup to enter Safe Mode
- Try uninstalling from there, some stubborn apps cooperate better in Safe Mode
Check for Running Processes
- Sometimes an app is still running in the background, preventing uninstallation
- Press Ctrl + Shift + Esc to open Task Manager
- Look for the app name in the list and click “End Task” if it’s there
- Then try uninstalling again